Power outages can strike without warning, turning your well-ordered life into a scramble for candles and cold dinners. That's when your Kohler generator steps in – a promise of uninterrupted power. But what happens when that reliable backup sputters, refuses to start, or delivers inconsistent power? Don't panic. As a seasoned journalist who's seen countless power struggles resolved, I’m here to guide you through Troubleshooting Common Kohler Generator Issues with confidence and clarity.
This isn't just about fixing a machine; it's about restoring your peace of mind. We’ll dissect the most frequent culprits behind generator headaches, offering step-by-step solutions that empower you to get your Kohler back online swiftly.
At a Glance: Your Quick Fix Cheat Sheet
- Safety First: Always prioritize disconnecting power and wearing protective gear before touching anything.
- Battery Power: About 60% of no-start issues stem from the battery. Check voltage (aim for 12.4V+ resting), clean connections, or consider a jump-start/replacement.
- Fuel Facts: Stale or contaminated fuel is the second biggest problem. Inspect, replace, and ensure steady fuel flow to the carburetor.
- Error Code Decoder: Your Kohler’s control panel speaks volumes. Write down codes before clearing; "LOW OIL" and "HIGH COOLANT TEMP" demand immediate attention.
- Maintenance Matters: Regular checks (weekly, monthly, annually) prevent most issues. Exercise your generator under load and change fluids/filters as scheduled.
- Know When to Call: Persistent electrical problems, knocking engines, or control panel replacements are best left to Kohler professionals.
Setting the Stage: Your Troubleshooting Toolkit
Before you dive into diagnosis, preparation is key. Think of yourself as a meticulous surgeon; you need the right tools and a sterile environment.
Safety Precautions: Your Non-Negotiable First Step
Seriously, don't skip this. Electricity and moving engine parts demand respect.
- Cut the Power: Absolutely crucial. Turn off your generator completely and disconnect all attached devices. If your generator is hardwired to your home's main panel via a transfer switch, ensure the utility power is off and the transfer switch is in the "utility" position or manually isolated from the generator.
- Gear Up: Slip on some sturdy work gloves and safety goggles. These aren't optional; they protect against cuts, hot surfaces, and splashed fluids.
- Ventilate: Work in an open, well-ventilated space. Generator fumes are dangerous, containing carbon monoxide.
- Fire Ready: Keep a fire extinguisher (ABC class is ideal) within arm's reach. Better safe than sorry.
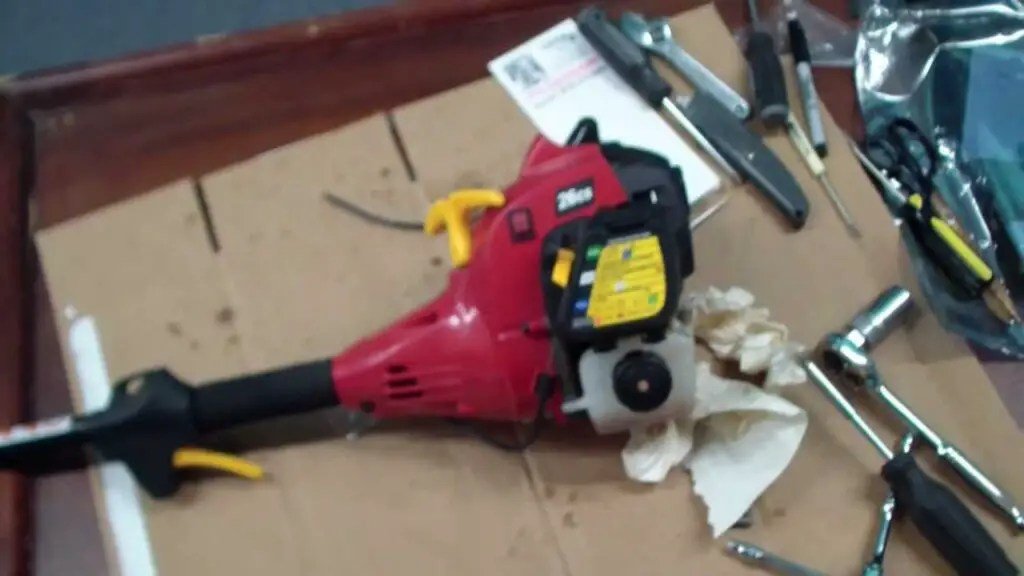
Essential Tools for the Job
Gather these before you begin. A little preparation saves a lot of frustration.
- Multimeter: Your electrical eyes and ears. Crucial for measuring voltage, current, and resistance.
- Wrench Set: For tightening or loosening nuts and bolts.
- Screwdrivers: Philips and flathead will cover most screws.
- Flashlight: Essential for peering into dark engine compartments.
- Owner’s Manual: Your generator’s bible. It contains specific model information, wiring diagrams, and troubleshooting charts. Keep it handy!
Common Roadblocks & How to Clear Them
Now, let's get down to the most frequent complaints we hear from Kohler owners.
Engine Won't Crank or Start: The Silent Alarm
This is by far the most frustrating issue: you hit the start button, and... nothing. Or maybe it cranks weakly but never catches. Here's how to systematically tackle it.
General Checks: The Quick Scan
Before deep diving, cover these basics:
- Fuel Level: It sounds obvious, but a low fuel level is a surprisingly common culprit. Check the tank!
- Battery Connections: Are they clean, tight, and corrosion-free? We’ll elaborate on this next.
- Spark Plug: A dirty or faulty spark plug can absolutely prevent starting. We'll get into how to inspect and replace it.
Battery Issues: The Heart of the Start (60% of Failures)
Your generator’s battery is its pulse. If it’s weak or poorly connected, nothing happens.
- Testing Voltage: Grab your multimeter. Set it to DC volts.
- A healthy, resting battery (generator off) should read at least 12.4 volts. Anything below 11.8 volts indicates a drained or failing battery.
- During cranking, the voltage must maintain over 9.6 volts. If it dips below this, even momentarily, the battery lacks the power to turn over the engine effectively, pointing to a need for replacement.
- Connections Matter: Loose or corroded terminals strangle the battery's power delivery.
- Disconnect Safely: Always disconnect the negative (-) terminal first, then the positive (+) when removing batteries. This prevents accidental shorts.
- Cleanliness is Key: Use a baking soda solution (one tablespoon baking soda per cup of water) and a wire brush to scrub away corrosion. Rinse with clean water and dry thoroughly.
- Secure & Protect: Reconnect the positive (+) terminal first, then the negative (-). Apply a thin layer of dielectric grease to the terminals to prevent future corrosion. Tighten all connections to 65 in-lb torque (check your manual for exact specifications if different).
- Jump-Start or Replace:
- If your battery reads between 11.8-12.3 volts, it might just need a boost. Use an automotive booster following standard jump-starting procedures: connect the positive (+) booster cable to the positive (+) generator battery terminal, then the negative (-) booster cable to a good, unpainted engine ground (like an engine block bolt). Crank for a maximum of 10 seconds.
- Crucial Warning: Never attempt to jump-start if you detect any fuel leaks. The spark from connections could ignite fumes.
- Replacement: Most residential Kohler units use Group 24F batteries. Ensure any replacement meets Kohler’s specified Cold Cranking Amp (CCA) requirements, which are vital for starting in cold weather.
Fuel System Issues: The Generator's Lifeblood (Second Most Common Failure)
Even with a strong battery, bad fuel or a blocked fuel path will stop your generator dead.
- Fuel Quality: Poor fuel is a silent killer of generator reliability.
- Inspect: Visually check your fuel for any signs of contaminants like dirt, water, or debris. Water contamination often looks like clear globules at the bottom of the tank or in the fuel.
- Right Type: Ensure you’re using the fuel type recommended in your owner’s manual.
- Freshness: Gasoline, especially ethanol-blended varieties, degrades rapidly – often in as little as 30 days. Old, stale fuel causes inconsistent power delivery and starting issues. If it smells sour or looks cloudy, replace it.
- Fuel Lines: The pathways for your fuel.
- Inspect: Look for any visible cracks, kinks, or leaks along the entire length of the fuel lines.
- Connections: Ensure all hose clamps and connections are tight.
- Replace: Damaged lines must be replaced immediately. Ethanol in modern fuels can degrade rubber and plastic lines over time; consider replacing fuel lines every 3 years as a preventative measure.
- Carburetor Woes: If your generator cranks but simply won’t start, the carburetor is a prime suspect. It mixes air and fuel.
- Cleaning: Carefully remove the carburetor bowl. Using a specialized carburetor cleaner spray, thoroughly spray through all jets and passages you can access (main jet, idle jet, emulsion tube).
- Heavy Varnish: For more stubborn blockages or heavy varnish, a rebuild kit (e.g., Kohler 24-853-10-S) might be necessary.
- Important: Never use metal tools or wire to clear jets; you can damage the precisely machined orifices.
- Fuel Flow Check: This diagnostic helps confirm if fuel is even reaching the carburetor.
- If your control panel displays "LOW FUEL" or "OVERCRANK" codes (after three failed start attempts), this check is critical.
- Disconnect the fuel line leading to the carburetor. Place the end of the line into a clear container.
- Crank the engine for about 10 seconds. You should see at least ¼ cup of steady fuel flow. If not, the problem lies upstream – likely the fuel pump, fuel filter, or a blockage in the tank.
- Fuel Filters: These are your fuel system's guardians.
- Replace: In-line fuel filters should be replaced every two years, or more frequently if operating in dusty environments or with questionable fuel quality.
Wobbly Power Output: When Your Lights Flicker
Is your generator running, but the power it produces feels off? Lights dimming, appliances struggling?
- Overload Check: First, ensure you're not simply asking too much of your generator. Exceeding its rated wattage will cause voltage drops and unstable output. Disconnect non-essential items.
- Fuel Quality Revisited: Remember our discussion on bad fuel? Inconsistent fuel delivery (due to old, contaminated, or incorrect fuel) directly translates to inconsistent engine speed and, consequently, fluctuating power output.
- Air Filter: A clogged air filter chokes the engine, leading to a "rich" fuel mixture that can cause stumbling and poor performance. Clean or replace it regularly.
Electrical Gremlins: The Hidden Wiring Woes
Sometimes the issue isn't mechanical, but electrical.
- Wire Connections: Just like battery terminals, other electrical connections can loosen or corrode, disrupting current flow.
- Safety First: With the generator completely off, visually inspect all accessible wire connections. Look for loose wires, frayed insulation, or green/white corrosion.
- Clean & Tighten: Clean corroded connections with a wire brush or electrical contact cleaner. Re-tighten any loose connections. Replace any wires that show signs of damage or excessive wear.
- Fuses: Your generator has fuses designed to protect electrical circuits from overcurrent.
- Locate & Inspect: Consult your owner's manual to find the fuse box. Gently remove each fuse and inspect its filament. A blown fuse will have a broken or visibly melted filament.
- Replace Correctly: Replace any blown fuses with a new one of the exact same amperage rating. Never use a fuse with a higher rating; it can damage components or pose a fire hazard.
Engine's Vital Signs: Oil and Air
These two elements are crucial for engine health and performance.
- Oil Levels: The engine's lifeblood. Low oil can cause shutdowns or prevent starting.
- Conditions: Ensure the generator is on a level surface, completely off, and has cooled down for at least 15-20 minutes.
- Check: Locate and remove the oil dipstick. Wipe it clean, reinsert it fully (don’t screw it in if it’s designed to just rest), then remove and check the level.
- Refill: If the level is below the "add" mark, add the recommended oil type (e.g., Kohler 10W-30) slowly until it reaches the upper dipstick mark. Do not overfill, as this can also cause problems like foaming and pressure buildup.
- Air Filter: Clean air is essential for efficient combustion.
- Access: With the generator off and cool, locate the air filter housing, usually a plastic box near the carburetor. Remove its cover.
- Inspect: Take out the filter element. Hold it up to a light; if you can’t see light through it, or if it's visibly caked with dirt and debris, it needs attention.
- Clean/Replace: Many foam pre-filters can be gently washed and air-dried. Paper filters should typically be replaced. Tap out loose debris or use compressed air blown from the inside out to clean paper filters. If heavily soiled, replace it. This is a key part of good generator maintenance tips.
Decoding Your Kohler's Message: The Control Panel & Error Codes
Your Kohler generator isn't just a hunk of metal; it’s a smart machine that communicates. Its control panel and error codes are invaluable diagnostic tools.
- Understanding Error Codes: Each code is a specific clue. For instance:
- Error Code 62 or "LOW OIL": Indicates critically low oil pressure.
- "HIGH COOLANT TEMP": Means the engine is overheating.
- "OVERCRANK": Signifies that the generator tried to start multiple times but failed (often pointing to fuel or battery issues).
- "LOW FUEL": The tank is running on fumes.
- Your Manual is Key: Always refer to your Kohler Generator Troubleshooting Manual for the precise meaning of each code.
- Resetting the Control Panel: Many temporary glitches can be cleared with a simple reset. Locate the reset button on your control panel, press and hold it for a few seconds until the system reboots. This is a common first step after addressing a noted issue.
- Immediate Action Codes: Some codes demand your urgent attention to prevent severe damage.
- "LOW OIL": If you see this, stop the generator immediately. Refill the oil to the proper level, then cycle the key OFF then ON to clear the code. Operating with low oil can quickly destroy the engine.
- "HIGH COOLANT TEMP": Again, shut down the generator. Once it's cool, check for radiator blockages (leaves, debris) and verify the coolant level. Refill with the recommended coolant type. Operating with high temperatures will cause catastrophic engine failure.
- Heads Up: Running your generator while these critical codes are active will almost certainly void your warranty.
- Pro Tip: Before you clear any error codes, make a note of them. If multiple codes appear, they often point to related problems, giving you a clearer picture of the root cause. This information is also invaluable if you eventually call a professional.
Preventative Care: Keeping Your Kohler in Prime Condition
An ounce of prevention is worth a pound of cure, especially with something as critical as your backup power. Following a consistent maintenance schedule is the single best way to avoid most troubleshooting scenarios.
- Weekly Checks: A quick visual sweep.
- Inspect for any visible wear and tear on belts, hoses, and connections.
- Look for any signs of leaks (fuel, oil, coolant).
- Listen for unusual noises during its exercise run.
- Keep the area around the generator clear of debris and vegetation.
- Monthly: Focus on the battery.
- Test battery voltage; replace if consistently below 12.4V.
- Clean battery terminals (even if they look fine).
- Every 6 Months: A deeper dive.
- Replace the air filter (or clean as per manufacturer's guidelines).
- Exercise Your Generator: Crucially, run your generator under a significant load for at least 30 minutes. This prevents fuel degradation, lubricates seals, and keeps all components active. This practice can prevent up to 90% of fuel-related failures.
- Annually (or Every 100-200 Hours, whichever comes first): The full tune-up.
- Change the engine oil and replace the oil filter.
- Replace the spark plug (ensure the gap is set to 0.030 inches or as specified in your manual). Understanding how to test a spark plug can save you time.
- Before Extended Storage: If you're putting your generator away for a season.
- Add a high-quality fuel stabilizer (typically 1 ounce per 2.5 gallons of fuel) to the fuel tank.
- Run the generator for at least 10 minutes to ensure the treated fuel circulates throughout the entire fuel system, preventing varnish buildup.
- During Extended Outages: If your generator is running for days on end.
- Fuel Stabilizer: Run the generator for 30 minutes weekly, even during an outage, if you're not using it consistently, to circulate fuel stabilizer.
- Oil Change: Change the oil every 100 hours of continuous operation. Your generator is working harder than usual.
- General Best Practices:
- Always refer to the specific service schedule in your owner’s manual, as intervals can vary slightly by model.
- When replacing parts, always use genuine Kohler parts or high-quality equivalents. This is particularly important for components like fuel filters and different generator fuel types.
- For comprehensive insights, you can always consult guides on Kohler Emergency Generators to ensure your system is always ready.
When to Wave the White Flag: Calling in the Pros
While many issues can be resolved with a bit of DIY troubleshooting, some problems are complex, dangerous, or require specialized tools and expertise. Knowing when to call a professional can save you time, money, and potentially prevent further damage.
Critical Warning Signs for Professional Help:
- No Start After Basic Troubleshooting: If you've gone through all the battery and fuel checks and your generator still won't start, it's time for an expert.
- Constant Stalling, Engine Knocking, or Unusual Smoke: These are red flags. Engine knocking can indicate serious internal damage, and unusual smoke (blue, black, or excessive white) points to significant combustion problems.
- Burning Smell or Persistent Electrical Output Issues: A burning smell often indicates an electrical short or overheating components. If you're experiencing consistent overvoltage or undervoltage issues that persist after simple checks or even after replacing an accessible voltage regulator, a professional needs to diagnose the electrical system.
- Controller Replacement: The generator's controller is its brain. Replacing it requires specialized programming and calibration that is typically beyond DIY capabilities and often requires proprietary tools.
- Continuous Operation Beyond 500 Hours: While generators are built tough, operating them consistently past 500 hours without a major service (often involving valve adjustments, detailed inspections) pushes manufacturer limits and can lead to accelerated wear.
- Complex Fuel System Issues: If you suspect a problem with the fuel pump, injectors, or a deep carburetor blockage that cleaning can't resolve, professional intervention is wise.
Warranty Information: Don't Void Your Coverage
- Typical Coverage: Kohler residential generators generally come with a robust 5-year/2000-hour warranty. Commercial units typically have 3-year/1500-hour coverage. Always verify your specific model's warranty terms in your manual.
- Contact Kohler: For warranty service or to find an authorized service dealer, contact Kohler directly at 1-800-544-2444.
- Beware Unauthorized Repairs: Attempting complex repairs or making modifications outside of specified maintenance can void your warranty. When in doubt, call Kohler or an authorized service center.
Professional Servicing: A Smart Investment
Consider scheduling annual professional inspections for your generator. These often include:
- Load Bank Testing: This is a crucial test that verifies your generator's ability to produce its full rated power output under controlled conditions. It simulates a real-world outage and ensures your generator is truly ready.
- Detailed Diagnostics: Professionals have diagnostic tools that can pinpoint elusive problems that aren't apparent with basic checks.
- Preventative Adjustments: They can make small adjustments (like valve clearances) that extend engine life and maintain efficiency.
Keep Your Power Flowing
A reliable Kohler generator is more than just a machine; it’s an assurance. By understanding these common issues, performing basic troubleshooting, and sticking to a consistent maintenance schedule, you empower yourself to keep that assurance strong. Don't let a power outage turn into a problem you can't solve. With a little knowledge and confidence, you can ensure your Kohler is always ready to step up when you need it most.